This year my kids used the Hey, Valentine set for their school valentines. I stamped and cut the number needed of the Pirate for one kid, and the school of fish for the other and then let them color them all, while I made a fancier version of each for the teachers :)
Here's the first:
Challenges I used:
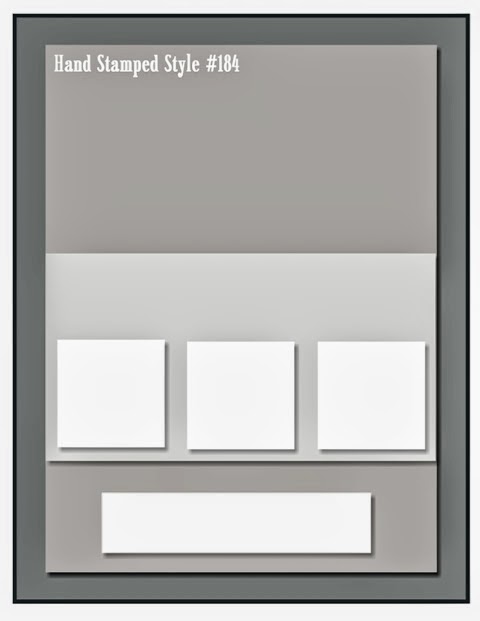
Stamplorations - (see sketch below)
Colour Q - (see palette below)
The Male Room - Valentine
Inky Impressions - Valentine/Love
Crafty Ribbons - Nautical
Although I do have a craft room, most of my stuff is done at my coffee table, while I watch TV once my kids (and often my hubby) are in bed. I'm a Stampin' Up! Demonstrator, and am here to create, share and inspire... I hope you see things you like! I'm always trying new things and trying to improve my creative process. If you see anything you have to have in your own stash, please click on the Shop button on the left to be taken to my Stampin' Up! website.
Friday, February 13, 2015
A REAL Challenge!!!
My son's Grade 4 teacher invited me to lead the class in making a Valentine's Day card for their parents. I was thrilled, and immediately made a list of the fairly basic techniques that would still WOW a group of young newbies. Some of these, I ruled out for time factors, others for lack of material on hand and limited time. The ones that stuck were a punch, an embossing folder and the three-in-one of heat emboss/resist/spritz. Then I had to redesign my overall design multiple times, keeping in mind that I didn't want to use any of my newer foam pads, as I feared it wouldn't stand up to 25 kids the way a classic linen pad would, and finally realizing that aside from a mini glue dot under the punched heart, the kids would only have glue sticks and/or white glue, so the layers needed to be flat and easy to adhere, for example, using the embossing side of the hearts, rather than the slightly more fun debossing side.
While this may not be my most impressive card, we had a blast, and most of them went off with only some minor hitches :D
Challenges I used:
I heart Sketches - (see sketch below)
The Paper Players - (see palette below)
Sparkle and Sprinkle - glitter and embossing powder (in one... iridescent!)
Penny Black - ATG except digi
While this may not be my most impressive card, we had a blast, and most of them went off with only some minor hitches :D
Challenges I used:
I heart Sketches - (see sketch below)
The Paper Players - (see palette below)
Sparkle and Sprinkle - glitter and embossing powder (in one... iridescent!)
Penny Black - ATG except digi
Saturday, February 7, 2015
Wishing for Spring
I love how fun and bright this card turned out, while still remaining soft... that's a hard balance to find! I found a lot of great new challenges to work with and of course I pulled out some Sale-A-Bration papers, ribbon and button :) I was originally planning to do the flower with a rock 'n roll technique with Crushed Curry in the center and Calypso Coral on the edge, to more closely resemble the inspiration picture, but when I decided to use the button, I changed the center color to Crisp Cantaloupe.
PS. I know that until this week, it has been a LONG time since I posted, which was mainly due to the extreme frustration and time involved doing a simple post with our ancient computer. Now that we have a new one, it's SO much faster, so I will be able to keep up with posting new things, and as I have some extra time, will be catching up on the many things I didn't post since last Spring/Summer... stay tuned!!!
Challenges I used:
Mojo Monday - (see sketch below)
Cupcake Inspirations - (see inspiration/palette below)
Stampotique Designers Challenge - Citrus Colours
Moving Along With The Times - Pastels
Simon Says - All Things Bright and Beautiful
Fab 'n Funky - Hearts and/or Flowers
Our Creative Corner - Bingo (Die Cuts, Stamps, Embossing Folder
PS. I know that until this week, it has been a LONG time since I posted, which was mainly due to the extreme frustration and time involved doing a simple post with our ancient computer. Now that we have a new one, it's SO much faster, so I will be able to keep up with posting new things, and as I have some extra time, will be catching up on the many things I didn't post since last Spring/Summer... stay tuned!!!
Challenges I used:
Mojo Monday - (see sketch below)
Cupcake Inspirations - (see inspiration/palette below)
Stampotique Designers Challenge - Citrus Colours
Moving Along With The Times - Pastels
Simon Says - All Things Bright and Beautiful
Fab 'n Funky - Hearts and/or Flowers
Our Creative Corner - Bingo (Die Cuts, Stamps, Embossing Folder
Monday, February 2, 2015
Love you...
I started this card with the sketch shown below, but as I assembled it, the butterfly (which was the oval in the sketch), decided to fly away from the center ;) For the make your own background challenge, I stamped the I Love Lace background stamp in Sahara Sand on the Whisper White, and then did the tissue paper linen silk on top. The rest of the challenges are pretty self explanatory, so here's my card...
Challenges I used:
Sketch Saturday: (see sketch below)
The Crafter's Cafe: Make your own Background
Just Add Ink: (see palette below)
Crafting for All Seasons: Things with Wings
Challenges I used:
Sketch Saturday: (see sketch below)
The Crafter's Cafe: Make your own Background
Just Add Ink: (see palette below)
Crafting for All Seasons: Things with Wings
Thursday, November 6, 2014
Bird on a Wire
After 4 years as a Demonstrator, I finally got a chance to attend a Stampin' Up! event! It was a total blast, full of fun, inspiration and freebies! There was also a contest to enter a card for the Ronald McDonald house, and the criteria was no text/sentiment, bright and cheery and of course, current product so others can copy. I didn't have a chance to make a card in time, thanks to Halloween, but I had time to make it after the morning sessions and brought it to the last Product Playground. It was too late to have a chance for votes, so they will be displaying it in Quebec instead so I have a chance to win :)
I used the Chevron background stamp with 3 colours again (this time, Indigo Island, Tempting Turquoise and Coastal Cabana), and I used the Melon Mambo, Pumpkin Pie and Definitely Daffodil to color the bird and fill in the sun.
Create with Connie and Mary - (see sketch below)
I used the Chevron background stamp with 3 colours again (this time, Indigo Island, Tempting Turquoise and Coastal Cabana), and I used the Melon Mambo, Pumpkin Pie and Definitely Daffodil to color the bird and fill in the sun.
Challenges I used:
Create with Connie and Mary - (see sketch below)
Pile it On - Feeling Cool
Vandicrafts - Bye, Bye Birdy
Wednesday, October 15, 2014
A Little Birdie Told Me...
I got to play with this Hostess set for my sweet niece's 4th birthday... I would have loved to use my Blendabilities for the image, but don't have the colors I needed yet. It would have been better if I'd planned better and used watercolor paper for my Stampin' Write markers, but I didn't have time for a do-over, so it is what it is...
Challenges I used:
Pile It On - 2 or more Die Cuts (the ovals)
Inspired by Stamping - (see sketch below)
Just Add Ink - (see palette below)
Craft-Room Challenge - Make your own Background
Through the Purple Haze - Wings and Bling
Papertake Weekly - Super Fly
Sunday, September 21, 2014
So many smiles...
Just a quick post so I don't miss yet ANOTHER challenge deadline, lol... tomorrow I will add and link to the other challenges I used and edit this description :)

Challenges I used:
Color Throwdown - see palette below
Monday, June 9, 2014
Fresh Flutterbies
With so many Thank You cards to make for various staff at my kids'
school, I'm trying to keep at least some of them quick and simple, and
what is quicker than washi tape!
Challenges I Used:
The Card Concept - (see palette below) Style: Clean and Graphic
CAS(E) This Sketch - (see sketch below)
Saturday, June 7, 2014
SuperDog!
This was a super quick and simple card I whipped up for a sweet nephew's birthday... I'm often unimpressed by my fast and basic cards I'm forced to do when I'm running behind for an event, but I think this one is pretty cute anyway ;) Especially since I finally grabbed this stamp set right when it retired, and I hadn't had a chance to try it out yet!
Challenges I used:
Sketch N Stash - (see sketch below)
Pause Dream Enjoy - Food or Beverage
Nutcrafters - Animals or Insects
Crafty Creations - All about S (Superhero, Spots, Stripes)
Just Add Ink - Just Add Cupcakes/Cake/Dessert
Little Red Wagon - Food for Thought
Wednesday, June 4, 2014
2014-2016 In Colors
When I get the new In Colors, my first card for that month's club is always something that uses all 5 colors, in both the cardstock and the inks, as a reference for them to see what they look like in real life. It's always a challenge, but this year is my favourite so far. And I managed to not only have all the colors stamped, but I did it on both the coordinating cardstocks as well as on the Whisper White, so all aspects are accounted for.
In doing so, I was afraid I would clutter the card up too much, and while I worried about adding the 3 watercolor stamps to the sentiment, I came up with a brilliant new use for the Stamp-a-ma-jig (if I do say so myself ;) )... below is the card when I thought it "might" be finished. I wanted to add the watercolour stamps and use each colour but I thought it might be too busy. So I put the clear, easy clean sheet from the Stamp-a-ma-jig over the card and stamped onto that. Turns out it looked just right :)
SUO Challenges - Stamping on the Background
Crafty Creations - The letter S (spots, stripes, splashes, stamps, Stamp-a-ma-jig)
Simon Says Stamp - Masculine
Work of Art
The only stamp set I preordered was Work of Art, but since it's so versatile I had no problem using it for BOTH club cards this month! First, here is the softer one, using the Lullaby DSP. The stretchy ruffle ribbon I love SO MUCH is retired, but I'm crossing my fingers it'll show up on the Clearance Rack soon enough and I can stock up ;) I used the watercolor paper, even though we weren't doing any "actual" watercoloring, because with the watercolor designs of this set, combined with the thirsty paper, the inks really soak in and blend, even without adding water! Watch for my bolder card tomorrow :) (Or is it technically today, seeing as how it's 1:30AM?) Also, I left it without a sentiment, because it's always good to have a "no reason" card in the stash, and there's enough room to add a sentiment in the upper left corner of the watercolor layer.
Challenges I used:
Mojo Monday - (see sketch below)
Color My Heart - Creme Brulee, Crystal Blue and Sorbet color palette
Sweet Stamps - Ribbons, Buttons and/or Bows
Inky Chicks - Use a Metal embellishment
Just Add Ink - Just Add Watercolour
Challenges I used:
Mojo Monday - (see sketch below)
Color My Heart - Creme Brulee, Crystal Blue and Sorbet color palette
Sweet Stamps - Ribbons, Buttons and/or Bows
Inky Chicks - Use a Metal embellishment
Just Add Ink - Just Add Watercolour
Sunday, May 11, 2014
Quick and Easy Boy Card
This is the second card I whipped up in a flash... I had already picked the challenges I was going to use, so it was easy to jump in, but with limited time, I had to change my vision to something simpler and faster.
After cutting and embossing the base, I laid the white layer down and arranged the Tape It stamps face down on it, and then stuck my F clear block onto them to lock them into place. Then I colored the stamps with markers (since they were too close together for ink pads), and stamped the whole shebang at once. Then a quick sentiment punched out and some Candy Dot brad stickers... easy peasy, lemon squeezy!!
Challenges I used:
Just Add Ink - (see sketch below)
Color Throwdown - (see palette below)
Little Red Wagon - Seeing Spots
Seize The Birthday - Birthday
Cardz 4 Guyz - Bingo (Blue, Image, Brads)
After cutting and embossing the base, I laid the white layer down and arranged the Tape It stamps face down on it, and then stuck my F clear block onto them to lock them into place. Then I colored the stamps with markers (since they were too close together for ink pads), and stamped the whole shebang at once. Then a quick sentiment punched out and some Candy Dot brad stickers... easy peasy, lemon squeezy!!
Challenges I used:
Just Add Ink - (see sketch below)
Color Throwdown - (see palette below)
Little Red Wagon - Seeing Spots
Seize The Birthday - Birthday
Cardz 4 Guyz - Bingo (Blue, Image, Brads)
The Perfect Elmo Card
You know those days when you realize you haven't made a card yet, for a very special kid's birthday and you're almost out of time, but you don't want to give them a stash card that isn't right for them? That happened to me TWICE this party filled weekend! The first was for my sweet nephew's 2nd birthday... this boy LOVES Elmo, and I've seen Elmo cards like this before, and could see how simple they look to make, so I figured it wouldn't take long at all. And really, the part that took the longest was trying on different size circle punches/diecuts until I felt like the proportions were just right.
I used the Circles Collection Framelits large scallop for the head, and also for the base (Basic Black cardstock, scored and folded, and then cut with the die top above the fold, so there was it could open without falling apart). I sponged the edge for "furry" texture and then cut and pasted the other circles (and half circle) until it looked just right. And although I'm very familiar with Elmo, I did get my kids' opinions to make sure I chose the best sizes, lol ;)
Tuesday, May 6, 2014
Strong as a Tree
This card mutated a few times as I created it, but it ended up looking better than what I imagined originally, so it was worth the "restarts" ;) I just LOVE this stamp!!! Great for Father's day, dad's birthdays and scrapbooking dad/kid moments. Have I mentioned how sad I am that the Co'redinations are saying goodbye? I REALLY love them!!!
Create with Connie and Mary - (see sketch below)
Sweet Stamps - Embossing
Ruby's Rainbow - Recipe (button, twine, embossing)
Word Art Wednesday - Anything Goes
Crafting by Designs - Anything Goes
Monday, May 5, 2014
Vintage, Fresh and Elegant
Since my June club will be focused on new In Colors and new goodies, I decided to do a Mother's Day card AND a Father's Day card this month... here's the Mother's Day card.
I wanted to show off some of my favourite retiring (but hopefully not sold out yet!) stuff while I still have the chance. I used the En Francais background stamp on the Naturals Ivory, and the Modern Medley DSP for a vintage look, along with ivory pearls. I also really wanted to play along with the DIY flower challenge, instead of just stamping and punching, so I decided to pull out my clay and molds (which thankfully are NOT retiring)! I'm SO glad I did, because these flowers really MAKE the card... I'm in love with how it all looks together!! With a small batch of clay embellishments, I usually either mix a bit of clay with a few drops of ink, or leave it white and sponge and/or marker the color on after they're dried, but since I had to premake the flowers for club, I made each flower with white, carefully popped them out right aways and then spritzed them with inked water. Then I pushed the center pearl in right away so they would dry into the flowers.
Challenges I used:
Handstamped Sentiments - (see sketch below, but link-up expired so I couldn't enter)
Color Throwdown - (see palette below)
Pause Dream Enjoy - Flowers
Little Red Wagon - DIY Flowers
Just Add Ink - (see image below)
Inspired By - (see image below)
Subscribe to:
Posts (Atom)